This is yet another advancement in Diabetes Management which has turned out to be a boon for me. Although Freestyle Libre Pro is a Flash Glucose Monitoring (FGM) system, which needs scanning the sensor each time and it shows only glucose trends in its graphs and uses a third party app named Glimp in case one wants to see the Real time Blood Glucose Readings.
A couple of years ago, I was using my Accuchek Performa Glucometer for testing my Blood Sugars and it was obviously very tedious to use when I’m out or even at home, as it required pricking finger each time and a set of things for testing. (https://poonamjadhavt1d.com/2019/07/27/glucometer-a-boon-to-diabetics/)
Its a fact that Glucometer still holds its place firm, still pricking your finger more than 4-5 times a days makes a diabetic feel more lazy and irritated.
It was difficult for me to adjust with Libre Pro sensor initially as it obviously gave me a foreign body feel (it is a strange feeling when something is stuck to your arm from outside, but gradually I became used to it)
To start with, I’ll say Libre pro has made diabetes management so very much easier than before. Earlier, I used to do 3-4 finger tests a day, still was clueless at times.
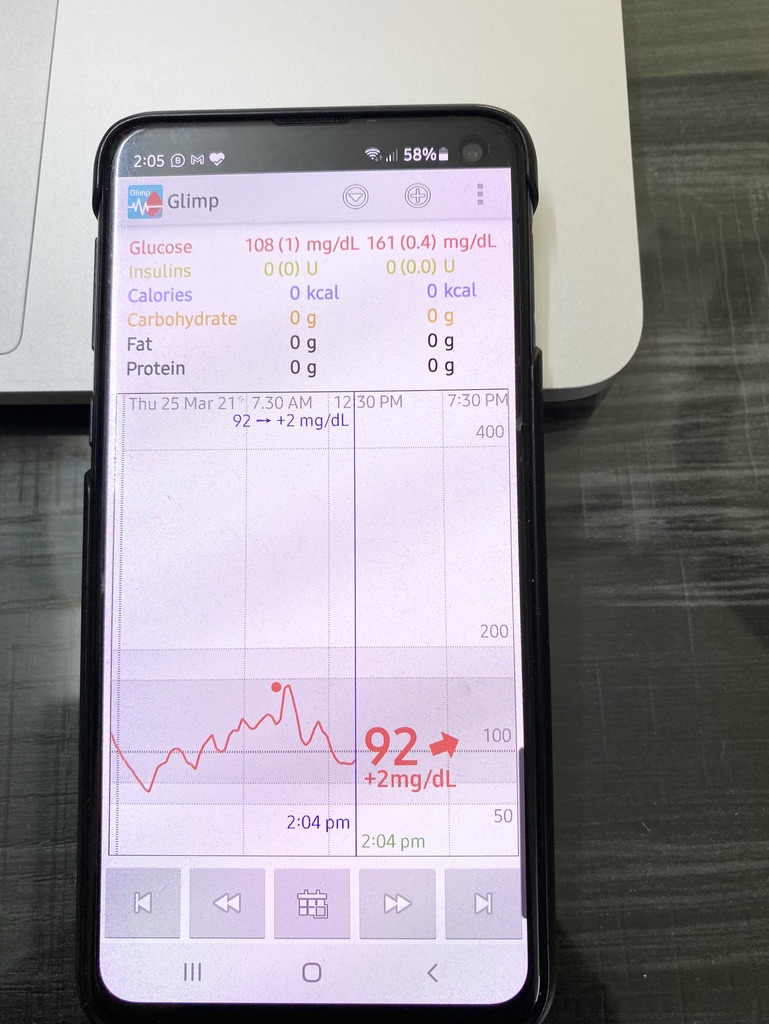
Though it needs a lot of efforts initially to use a Libre pro sensor but its worth the effort. Abbott’s Freestyle Libre Pro basically shows the graphs or trends in blood sugars and not the real time blood glucose readings, hence, it needs a third party app known as Glimp to show the blood sugar values at the moment.
All we need :
- Abbott’s Freestyle Libre Pro Reader
- Libre Pro Sensor
- NFC enabled mobile phone compatible with the sensor
As beginners we can refrain ourselves from purchasing a Reader, all we have to do is talk to your Abbott’s executive and he’ll apply the sensor and activate at the same time for you. Once we are fully accustomed with it, one should purchase a Reader to activate the sensor and avoid the unnecessary hassle to call the Libre Pro Executive for application.
How to apply the sensor?
This can be very well explained with the help of a video. Have a look:
Once you apply the sensor you have to activate it with the help of a reader and after an hour the sensor starts recording the Blood sugars for next 14 days. Glimp app starts recording sugars within few minutes and requires calibration 3-4 times.
Currently, I’m using Samsung Galaxy S10E (NFC Enabled) phone for Glimp app.
Calibration :
Once you put a sensor, you’ll have to calibrate the sensory glucose readings.
First check your Blood Sugar in your glucometer followed by the levels in your Glimp app. Now, you have to calibrate your sensory glucose readings as follows –
Things to Remember :
- Always calibrate when your sugars are stable or not fluctuating. For example : Usually Fasting blood sugars are the most stable ones as the person didn’t ate for last 8-10 hours and there are less chances of fluctuation.
- Do not always rely on Sensory glucose and in case of hypos or hypers always go for a finger testing. (https://youtu.be/yOvDOYHIt9o)
3. Remember all NFC enabled phones are not compatible with your sensor and do check the compatibility with the sensor before purchasing.
